Introduction Last updated: 2023-05-07

Integrate Sendeach's marketing or OTP messaging services into your apps or websites using our API. To do this, developers will require a Sendeach Authentication Key (refer to our documentation on User Authentication Key) and can access our APIs.

Kindly download our Postman Collection which contains all the APIs mentioned below for your reference.

Whatsapp API Last updated: 2023-05-07

To use our API, users need to register and log into the SendEach dashboard, and set up their default sending gateway in the developer module they plan to use.

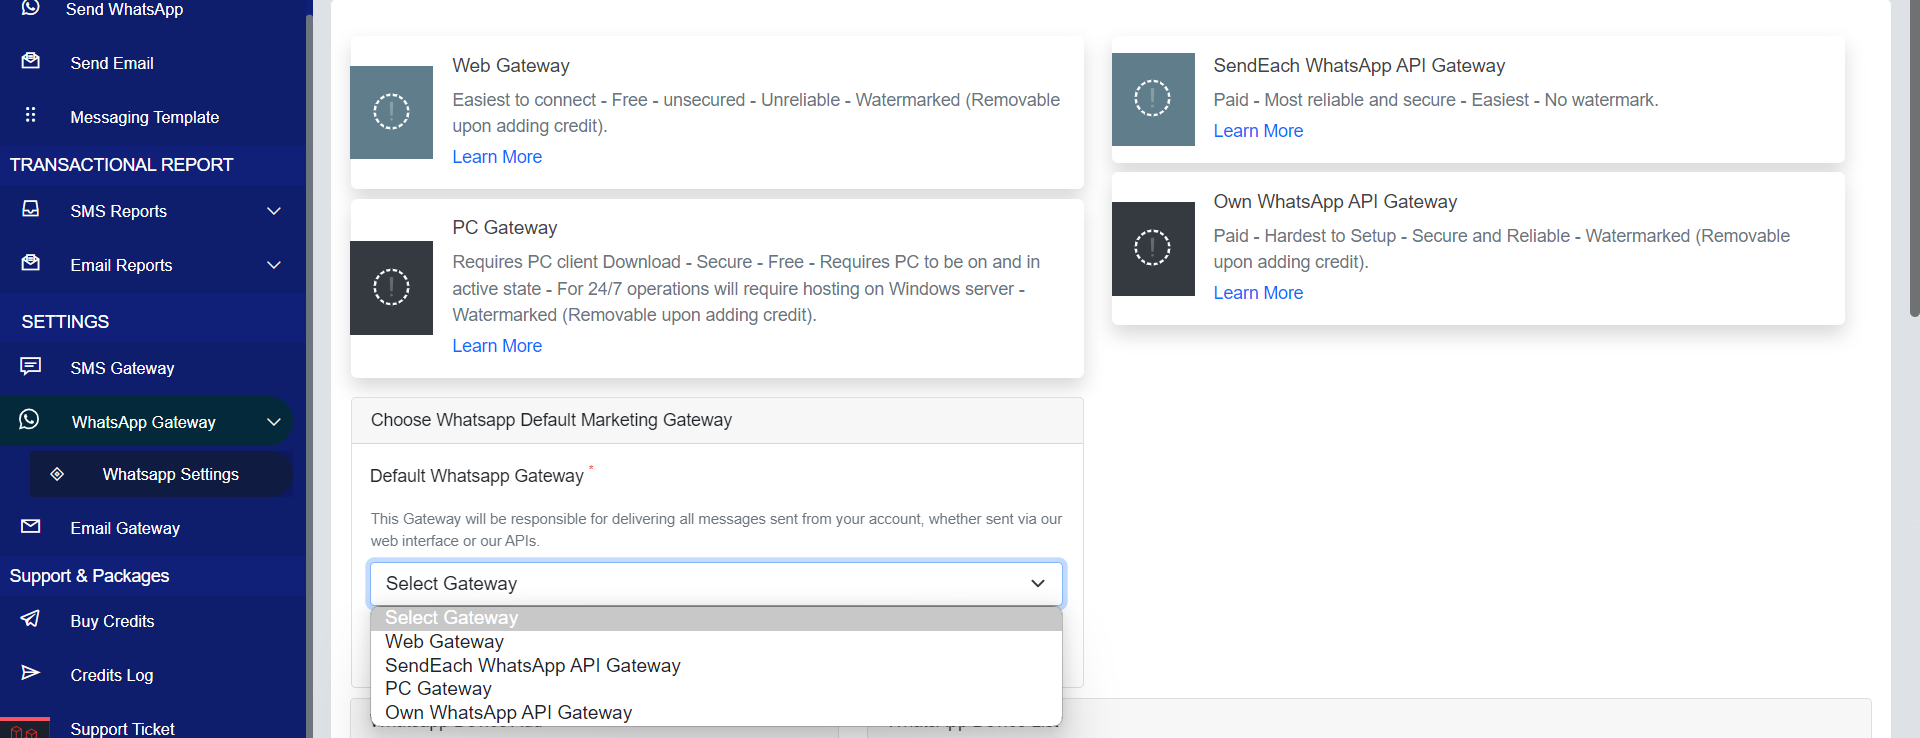
Set Default Whatsapp Gateway

1. Set up Your Whatsapp Default Gateway.

Please consult our Whatsapp Gateway documentation to learn how to set up your preferred gateway, which will be utilized for sending messages through our API for developers.

Note: This API is only Applicable to Web and Desktop Gateway.

login

Send Whatsapp Web/Desktop Message

Request Syntax

curl -X POST --location 'https://sendeach.com/api/whatsapp/send' \
     --header 'Accept: application/json' \
     --data '{
                 "recipients": {recipients},
                 "whatsapp_device": {whatsapp-device}, // Optional, if nothing givens then random device is chosen and sent
                 "message": {message}
             }'
Parameters Placeholders

{recipients} - Array of recipient phone numbers with country code. Ex: ['12334566677', '12312312112']

{whatsapp-device} - Whatsapp Device ID [Integer]. (Optional)

{message} - Text Message to send.

Sample Response

{
    "status": "success",
    "data": {
        "log_ids": [
            {
                "whatsapp_id": 5,
                "to": "9876543210",
                "initiated_time": "2023-05-01T08:24:35.973291Z",
                "message": "Hello User",
                "status": 1,
                "id": 319
            },
            ...
        ]
    }
}

Status Value can be used to track message delivery status:

status - 1 -> Pending

status - 2 -> Scheduled to send later.

status - 3 -> Failed to send.

status - 4 -> Successfully Sent

status - 5 -> Processing

SMS API Last updated: 2023-05-07

The SendEach SMS API should only be used for transactional purposes or in OTP applications.

You need to have an API token ready, before you can start using our API. If don't have a API Token ready, Click Here to learn how to create one.

Set Default SMS Gateway

1. Set up Your SMS Default Gateway.

This will be the gateway all the messages will be sent from the SMS API.

login

Send Message

Request Syntax

curl --location 'https://sendeach.com/api/send_sms' \
    --header 'Accept: application/json' \
    --data '{
        "device_id": {device_id},
        "recipients": {recipients},
        "message": {message},
    }'
Parameters Placeholders

{recipients} - Array of recipient phone numbers with country code. Ex: ['12334566677', '12312312112']

{device_id} - Device ID [Integer] to use as a sender. (Optional)

{message} - Actual Message Text Content to send.

Sample Response

{
    'status': "success" ,
    'message': "New SMS request sent, please see in the SMS history for final status" ,
}

Email API Last updated: 2023-05-07

Set Default Email Gateway

1. Set up Your Email Default Gateway.

This will be the gateway all the messages will be sent from the Email API.

login

Send Message

Request Syntax

curl -X POST --location 'https://sendeach.com/api/email/send' \
             --header 'Accept: application/json' \
             --data '{
                    "email": {emails},
                    "message": {message},
                    "subject": {subject},
                    "from_name": {from-name}, // optional
                    "reply_to_email": {reply-to-email} // optional
            }'
Parameters Placeholders

{emails} - Array of recipient Emails. Ex: ['[email protected]', '[email protected]']

{message} - Actual Message Text Content to send. It can be HTML.

{subject} - Subject of the email.

{from_name} - Sender From Name.

{reply_to_email} - Reply To email.

Sample Response

{
    'status': 'success' ,
    'message': "New Email request sent, please see in the Email history for final status"
}